Taking up the Slack with RocketChat
Phil Shirley
november 26th, 2018
Here at Infinity Interactive, we are an entirely remote team. As such, high availability of our communication tools is paramount to our success. Our daily methods of communication include JIRA, email, commit messages, and even, gasp, telephones. While these are effective at doing their job, they are not a replacement for that “human” feel you get when you go into an office and have the ability to have group and individual conversations with your co-workers. For that piece of the puzzle, we use Slack.
the problem
Slack provides us with real-time messaging between our teammates, as well as a select list of external partners. It also allows us to share files, make conference calls, and provides us with a much needed outlet to tell the latest and greatest dad joke. For the most part, Slack is great. It’s intuitive, fairly affordable, pretty reliable, and consistently gets new features.
On the down side, Slack is an external platform. Sometimes we wind up being subject to outages over which we have no control. Since communication is so vital to what we do, we decided to look for a solution that could be used on-demand for when there was an outage at Slack.
the solution
In order for this solution to meet our needs, several criteria had to be met. First and foremost, the solution had to be easily deployed and running with little to no additional configuration or administration. This means that once the solution is running, all of our teammates should be able to login and go about their day as if nothing happened. On that same note, since this is primarily used as a back up, the software instance had to be easily destroyed, but have its state retained for the next time it is used. Finally, since Infinity loves open source, our preference would be to use an open source solution.
Enter RocketChat. RocketChat is an enterprise grade, open source, real-time chat platform which offers both self-hosted and managed plans, and excellent documentation for installation.
making it work
When using Ubuntu 16.04 and higher, the method in which RocketChat is installed is via a “Snap”. Snaps are software packages that are containerized. More information on snaps can be found at Snapcraft
With Snaps enabled on Ubuntu 16.04 and higher, installation is as
simple as sudo snap install rocketchat-server.
Great. This sounds simple enough, but we want this to be an on-demand solution. We don’t want to have a server running all the time, silently accruing AWS charges. So we have to provision a server, deploy that server into the appropriate VPC, and configure security groups. This is starting to sound like a time consuming process and certainly not something that would be easily deployable in the event of an outage. Wait, what’s that popping its head up from our operations toolbox? It’s Terraform to the rescue.
With Terraform we can create our infrastructure programmatically and re-use that infrastructure as needed. Using Terraform also provides us with a way to make changes to the underlying infrastructure, track those changes when used in conjunction with version control applications, such as BitBucket, and then easily deploy the necessary resources.
prerequisites
While Terraform is awesome in that it can be used across many providers, this solution was deployed on AWS, and the example below is for usage with the AWS platform. Remember, Terraform will need to be installed and configured if it has not already been set up.
the code
Supply your AWS Access Key, Secret Key, and desired Region. Since these are sensitive credentials, it is advisable to create a configuration file which contains your variable definitions and credential information. As a manner of best practice, the configuration file with secrets should not be stored in version control.
provider "aws" {
  access_key = "${var.aws_access_key}"
  secret_key = "${var.aws_secret_key}"
  region     = "desired-aws-region"
}

resource "aws_key_pair" "deployer" {
  key_name   = "${var.key_name}"
  public_key = "${var.public_key}"
}

data "aws_security_group" "security_group" {
  id = "${var.security_group}"
}
Provision and deploy the EC2 instance. In order to utilize the snap installation of RocketChat, we are using the Ubuntu 16.04 AMI.
data "aws_ami" "ubuntu" {
  most_recent = true

  filter {
    name   = "name"
    values = ["ubuntu/images/hvm-ssd/ubuntu-xenial-16.04-amd64-server-*"]
  }

  filter {
    name   = "virtualization-type"
    values = ["hvm"]
  }

  owners = ["099720109477"] # Canonical
}

resource "aws_instance" "web" {
  ami             = "${data.aws_ami.ubuntu.id}"
  instance_type   = "t2.micro"
  key_name        = "${aws_key_pair.deployer.key_name}"
  security_groups = ["${data.aws_security_group.security_group.name}"]

  # Now for the fun stuff, installing RocketChat on our EC2 instance.

  provisioner "remote-exec" {
    connection {
      type        = "ssh"
      user        = "ubuntu"
      private_key = "${file(var.private_key)}"
      agent       = true
    }

    inline = [
      "sudo snap install rocketchat-server",
      "sudo rocketchat-server.initcaddy"
    ]
  }
  tags {
    Name = "II-RocketChat"
  }
}
Then we’ll need to define some local variables and outputs so that Terraform will spit out the details of our deployment.
locals {
  this_id         = "${join(",", aws_instance.web.*.id)}"
  this_key_name   = "${join(",", aws_instance.web.*.key_name)}"
  this_public_dns = "${join(",", aws_instance.web.*.public_dns)}"
  this_public_ip  = "${join(",", aws_instance.web.*.public_ip)}"
}
output "id" {
  description = "List of IDs of instances"
  value       = ["${local.this_id}"]
}
output "key_name" {
  description = "List of key names of instances"
  value       = ["${local.this_key_name}"]
}
output "public_dns" {
  description = "List of public DNS names assigned to the instances. For EC2-VPC, this is only available if you've enabled DNS hostnames for your VPC"
  value       = ["${local.this_public_dns}"]
}
output "public_ip" {
  description = "List of public IP addresses assigned to the instances, if applicable"
  value       = ["${local.this_public_ip}"]
}
Setting up the security group rules to allow traffic to reach the RocketChat server.
resource "aws_security_group" "allow_some" {
  name        = "allow_some"
  description = "Allow important inbound traffic"

  ingress {
    from_port   = 0
    to_port     = 22
    protocol    = "tcp"
    cidr_blocks = ["0.0.0.0/0"]
  }
  ingress {
    from_port   = 22
    to_port     = 22
    protocol    = "tcp"
    cidr_blocks = ["0.0.0.0/0"]
  }
  ingress {
    from_port   = 80
    to_port     = 80
    protocol    = "tcp"
    cidr_blocks = ["0.0.0.0/0"]
  }
  ingress {
    from_port   = 443
    to_port     = 443
    protocol    = "tcp"
    cidr_blocks = ["0.0.0.0/0"]
  }
  ingress {
    from_port   = 0
    to_port     = 0
    protocol    = "icmp"
    cidr_blocks = ["0.0.0.0/0"]
  }

  tags {
    Name = "Rocket_Chat_Security"
  }
}
Once the Terraform template is completed, it can be executed by
running terraform apply.
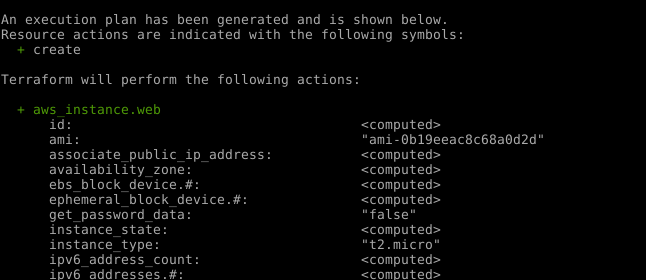
When the terraform apply command is issued, Terraform will output
a list of the resources that are going to be configured.

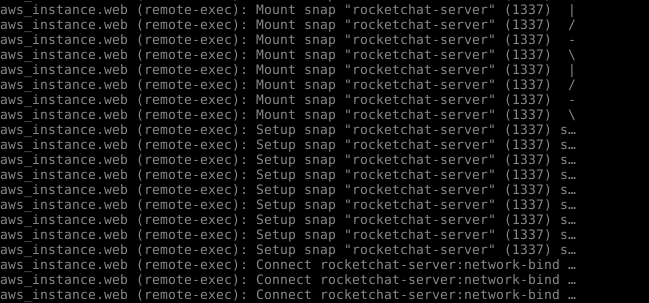
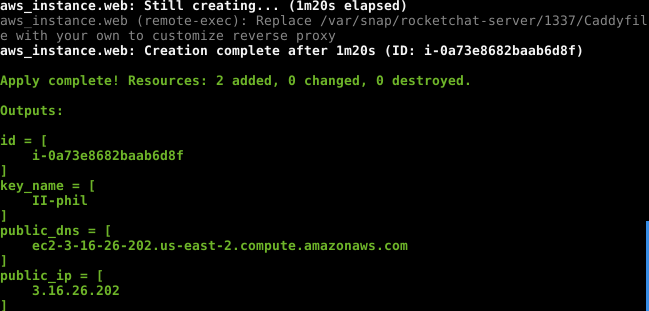
If the plan to be executed is correct, confirm the execution of the plan. Terraform will then output all relevant information pertaining to the infrastructure deployment.

Once the process is complete, Terraform will indicate that the resources have been provisioned.

Look at that speed! The stack was deployed and RocketChat installed in less than 5 minutes.

As stated earlier, one necessity for this backup chat solution is
that it can be as easily destroyed as it can be created. This can be
accomplished by simply issuing the terraform destroy command.
There you have it. Spinning up a chat server and tearing it down with the speed of a rocket.
areas of improvement
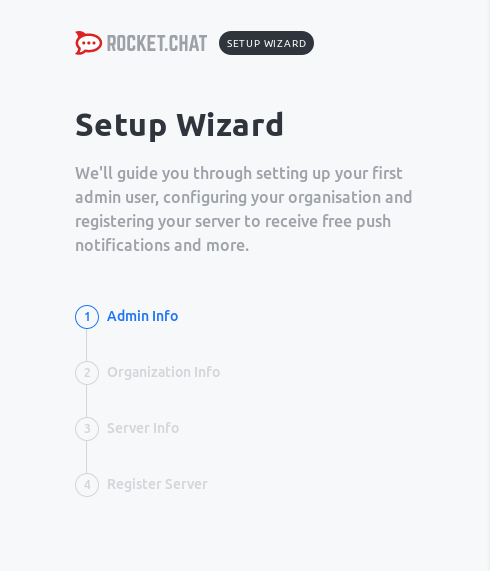
While the above steps quickly set up the infrastructure necessary to run a RocketChat server, some additional configuration is necessary. These items include configuring the server with the correct domain name and restarting the application server, as well as connecting RocketChat to Active Directory for user authentication. Finally, it would be an extra bonus if the RocketChat database were backed up prior to termination of the server allowing us to have a standing history of messages.
Look for an upcoming post on how we leverage a configuration management tool, such as Chef, to handle these items.